- A “cheap” housing option can still be unsafe if it can break your cash flow under a rate shock or deposit risk.
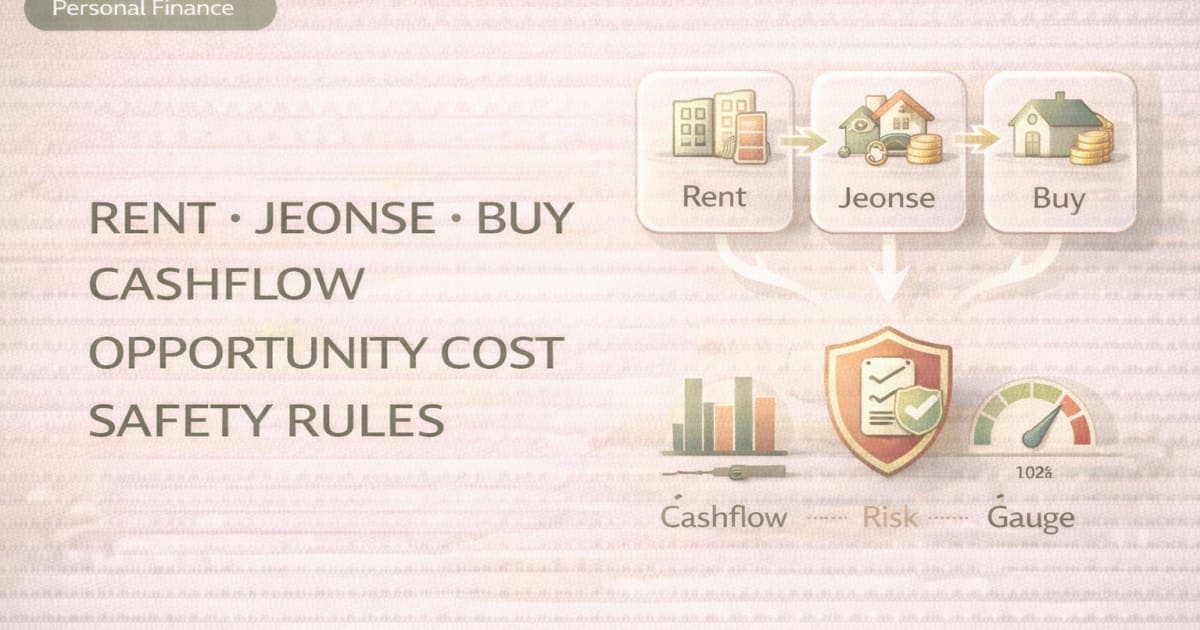
- Rent, jeonse, and buying are not apples-to-apples; the right comparison is plan stability: cash flow, liquidity runway, and trigger risks.
- Start with a local price band (median + range) from the apartment dashboard so you don’t debate fantasy numbers.
- Treat jeonse as a return trade-off: you “earn” by avoiding rent, but you “pay” via opportunity cost and deposit risk.
- Treat buying as a leverage + refinance risk problem before it’s a “price prediction” problem.
- A safer choice is one where your “fail condition” is far away even if rates rise, income drops, or liquidity tightens.
- Use risk triggers (rate reset, renewal cliff, deposit return risk, forced selling conditions) to define your rulebook.
- You can make a rules-based decision without predicting prices by using thresholds, buffers, and time windows.
- The dashboard can also reveal “support vs break” zones—where similar homes repeatedly trade or suddenly freeze.
- Your goal is not to win the lowest monthly cost—it’s to avoid a housing decision that forces you to abandon your plan.
PERSONAL FINANCE · HOUSING DECISIONS
Rent vs Jeonse vs Buy — Build a “Safety-First” Rulebook
Stop asking “what’s cheaper?” and start asking “what keeps my plan intact?” Compare cash flow, opportunity cost, and risk triggers using a dashboard-anchored price band.
In Korea, housing decisions often fail for one reason: the math was “average-case,” but life is not. This guide turns rent/jeonse/buy into a rules-based plan you can defend even when rates move or the market freezes.
- Set your inputs: price band, deposit, loan size, and your “fail condition.”
- Compare properly: monthly cash flow + opportunity cost + triggers (not vibes).
- Decide safely: choose the option that gives the biggest buffer against your real risks.
Currency note: this post uses KRW because the decision is Korea-specific; any USD intuition uses a rough 1 USD ≈ 1,250 KRW.

Most people compare rent, jeonse, and buying with one question: “Which is cheaper?”
But cheap can be fragile. A decision is “safe” when your plan still works under stress: rate shocks, renewal jumps, deposit return delays, or temporary income drops.
To avoid debating abstract numbers, anchor your inputs to the apartment dashboard first: South Korea Apartment Transaction Dashboard.
You’ll use it not to predict prices, but to define the price band you’re actually deciding inside.
What to read on the dashboard (60 seconds)
- □ Distribution: the local price band (median + top/bottom range) for comparable apartments
- □ Trend: recent 6–12 month direction (steady drift vs sudden break)
- □ Volume & recovery signals: “freeze” vs “base-building” (thin volume) vs “real recovery” (broad participation)
One-line takeaway: If you don’t anchor the price band first, your rent/jeonse/buy comparison becomes a debate about imaginary homes.
“Cheaper” is a cost question; “safer” is a failure-risk question
A safe housing decision answers three questions:
- Cash flow survivability: Can you still pay when things go slightly wrong?
- Liquidity runway: If you need cash quickly, do you have a runway—or are you locked?
- Trigger risks: What events can force a bad outcome (deposit delay, renewal shock, refinance cliff, forced sale)?
This is why “rent is throwing money away” and “buying is always better” both fail as universal rules.
Step 1: Anchor your “decision band” using the dashboard (so you compare the same home)
Open the dashboard: South Korea Apartment Transaction Dashboard and do one thing: pick a realistic band for the type of home you actually want (location + size + comparable complexes).
Then write your decision band like this:
- Lower bound: “If we buy, we can live with this area/complex at this price.”
- Upper bound: “If we buy above this, our buffer becomes fragile.”
- Target band: “Most likely option we’ll choose.”
Table 1) Inputs you must define before comparing rent/jeonse/buy
| Input | Why it matters | Practical rule (prediction-free) |
|---|---|---|
| Dashboard price band (KRW) | Defines the same “home class” across options | Use median as baseline + set a hard cap at your upper bound |
| Available cash (KRW) | Determines buffer and opportunity cost | Keep a minimum emergency reserve untouched (do not spend to zero) |
| Loan size + rate type | Sets refinance and cash flow risk | Stress test +1%p / +2%p and define “fail payment” |
| Jeonse deposit (KRW) | Opportunity cost + deposit return risk | Treat it like capital at risk; plan for delay or partial recovery |
| Monthly budget cap (KRW) | Prevents lifestyle drift | Use a cap you can keep even if income drops temporarily |
| Time horizon (years) | Determines what “safe” means | Short horizon = prioritize flexibility; long horizon = buffer + durability |
Interpretation (how to use this table):
- If you can’t fill these inputs in 10 minutes, you’re not ready for a “buy vs rent” conclusion—you’re still missing the decision frame.
- The dashboard band prevents you from comparing “rent in Area A” vs “buy in Area B” without admitting it.
- The goal is not precision; it’s to define a band and a cap you can defend.
Step 2: Compare the three options with the same three lenses
Here’s the simple mental model:
- Rent: pay monthly to buy flexibility; low capital lock, high recurring cost sensitivity
- Jeonse: “prepay” housing with capital; low monthly cost, higher capital lock + deposit risk
- Buy: convert housing into leveraged ownership; highest sensitivity to rates/financing conditions
Misconception box: “Jeonse is always a win” / “Buying is always building wealth”
Misconception: “Jeonse is automatically better than rent because you ‘get your money back,’ and buying is always better because it’s an asset.”
Reality: Jeonse can be unsafe when deposit return risk rises or opportunity cost becomes large. Buying can be unsafe when refinancing risk or payment shock is near.
Fix: Compare by “plan failure probability” using cash flow + liquidity runway + triggers—not by slogans.

The comparison table that matters: monthly cash flow and risk triggers (anchored to your dashboard band)
This is the table most people skip—and that’s why they panic when headlines change.
Table 2) Rent vs Jeonse vs Buy — cash flow + risk triggers (use the dashboard band as the anchor)
Assume you’ve chosen a candidate price band from the dashboard (e.g., “KRW X–Y”). Replace the numbers with your band.
| Option | What you pay monthly (cash flow) | What you lock (capital) | Primary risk triggers (what breaks the plan) | “Fail condition” you must define |
|---|---|---|---|---|
| Rent | Rent + utilities (predictable, ongoing) | Low to medium (deposit) | Rent jump at renewal; income drop; moving friction | Monthly housing cost > your cap for 3+ months |
| Jeonse | Low monthly (but deposit opportunity cost exists) | High (deposit) | Deposit return delay; landlord credit risk; guarantee coverage gaps; renewal negotiation | Deposit not recoverable within required window (e.g., 3–6 months) |
| Buy (mortgage) | Principal + interest + maintenance + taxes | Medium (down payment) | Rate reset; refinance failure; liquidity tightening; forced selling | Payment at stress rate (+1%p, +2%p) breaches cap OR cash reserve falls below runway |
Interpretation:
- Rent is “cash flow risk.” Jeonse is “capital lock + counterparty risk.” Buying is “rate + liquidity + leverage risk.”
- Your safest choice is the one where the fail condition is farthest away under realistic stress.
- If you cannot write the fail condition in one sentence, you don’t have a rule—you have a hope.
One-line takeaway: The best option is the one whose triggers you can survive, not the one that looks cheapest this month.
Opportunity cost: the hidden cost that decides jeonse vs rent (and sometimes buy)
Jeonse often “feels” cheap because the monthly payment is low. But economically, you’re paying with capital: you lock a deposit that could have earned a return (or paid down high-rate debt).
You don’t need to predict market returns. You only need a range of realistic net returns (after tax/fees/behavior). Then compare that to the rent you avoid.
Table 3) Jeonse opportunity cost vs rent: a simple break-even check
| Item | How to compute | What it means |
|---|---|---|
| Annual opportunity cost | Jeonse deposit × net return assumption | “Hidden” annual cost of locking deposit |
| Monthly opportunity cost | Annual opportunity cost ÷ 12 | Comparable to monthly rent burden |
| Break-even rule | If monthly rent saved > monthly opp. cost → jeonse is cheaper on cash flow | Still must pass deposit-risk checks |
| Stress rule | Use low/medium/high net return assumptions | Avoid single-number illusions |
Interpretation:
- If your realistic net return assumption rises (rates high, safe yields higher), jeonse becomes “more expensive” via opportunity cost—even if monthly is low.
- If your deposit return risk rises, jeonse becomes unsafe even if it looks cheap.
- This is why “jeonse is always good” fails: the decision flips when opportunity cost and deposit risk rise.

Dashboard signals: how to tell “support” vs “break” without predicting prices
The dashboard is useful because it shows whether the market is behaving like:
- Support zone: trading continues around a band; buyers appear repeatedly
- Break zone: transactions disappear, or prices gap down with volume changes
- Noise zone: a few trades print, but volume is too thin to trust the move
You’re not forecasting—you're deciding how strict your rules should be.
Table 4) Dashboard metric → interpretation → next action (rules-based, no prediction)
| Dashboard metric | Interpretation | Next action |
|---|---|---|
| Price distribution (median + range) | Your decision band; shows what “normal” looks like for comparable homes | Set your hard cap and define “walk-away” level |
| 6–12 month trend slope | Drift vs break; tells you whether the market is stable or fragile | Tighten buffers if trend is breaking; prioritize flexibility |
| Transaction volume | Real participation vs thin prints | If volume collapses: assume liquidity risk; avoid thin-buffer leverage |
| “Recovery” pattern (breadth) | Broad recovery is safer than a few spikes | If only a few trades: treat as uncertain; avoid committing all cash |
| Volume + price together | Divergence signals regime change | If price up on thin volume: don’t chase; if price stable on improving volume: safer to plan |
Interpretation:
- A support zone doesn’t mean prices can’t fall—it means you can plan with less liquidity risk.
- A break zone doesn’t mean prices must keep falling—it means your plan must assume higher uncertainty and stricter buffers.
- Most housing mistakes come from ignoring liquidity: “I can afford it” is different from “I can exit safely if needed.”
One-line takeaway: The dashboard isn’t for prediction—it’s for choosing how strong your buffers must be.
Two scenarios: how the “safer” choice flips when conditions change
Below are two common Korea-context scenarios where people get stuck. Notice how the solution is not a prediction—it’s rule changes.
Scenario 1) High-rate stress + renewal risk: “Rent feels painful, jeonse feels safe—until it isn’t”
- Setup: You can afford rent today, but renewal could jump; jeonse looks attractive.
- What flips the decision: if net safe yields rise, jeonse opportunity cost rises; if deposit risk rises, jeonse safety falls.
- Rule-based action: choose jeonse only if (1) deposit return risk is mitigated (guarantee + landlord safety checks) and (2) you keep a liquidity runway untouched.
Practical rule:
- If choosing jeonse forces you to drain emergency reserves to near zero, it’s not safer—it’s just different risk.
Scenario 2) Upgrader with existing home: “Buying the next home” vs “jeonse bridge” vs “rent bridge”
- Setup: You want to move, but selling timing is uncertain.
- What flips the decision: liquidity and timing risk dominate; “bridge” strategy matters more than monthly cost.
- Rule-based action: if your sale timing is uncertain, a bridge should maximize flexibility and minimize forced-sale risk.
Practical rule:
- If a buy decision makes you vulnerable to a forced sale (due to overlap loans or timing mismatch), prefer a bridge (rent or jeonse) that protects optionality.

10-minute checklist: pick the option that keeps your plan intact
Use this checklist exactly as a decision script. If you can’t check an item, the answer is “not safe yet.”
Checklist A) Safety-first decision (rent vs jeonse vs buy)
- □ I defined my dashboard price band (lower/median/upper) and set a hard cap.
- □ I wrote one fail condition sentence for each option (rent/jeonse/buy).
- □ I stress-tested the buy payment at +1%p and +2%p (or your realistic shock) against my monthly cap.
- □ I kept emergency reserves untouched (I did not “spend to zero” to make the math work).
- □ I evaluated jeonse as opportunity cost + deposit risk, not “free housing.”
- □ I can survive 3–6 months of disruption (income drop, move delay, deposit delay) without panic selling.
- □ I chose the option that maximizes buffer against my most likely trigger, not the option that wins the best-case spreadsheet.
Checklist B) Jeonse deposit safety (counterparty + timing)
- □ I confirmed how deposit protection/guarantee applies to my contract and building type.
- □ I checked the landlord/contract safety signals that reduce deposit return risk.
- □ I have a plan if deposit return is delayed (bridge funds, time buffer, fallback housing).
- □ I will not lock the entire deposit if it removes my liquidity runway.
Make your decision rules stronger with these related guides
If you want the housing decision to fit into a stable household system (not a one-off bet), these are the most useful next reads:
Mid-post (for building your base system and buffers):
- Build a simple household system first (budget → emergency fund → long-term investing)
- Size your emergency fund by real risk (not a generic “months” rule)
Near the end (for stress-proofing your plan and comparing trade-offs realistically):
- Protect your cash flow under inflation (fixed-cost restructuring playbook)
- Use the interest-rate threshold rule to decide: pay debt first or invest first
- Use CAGR to compare opportunity cost realistically (not with vague “7% per year” talk)
For the actual numbers, use the Goal Amount Simulator to test cash-flow targets and the Compound Interest Calculator to estimate deposit opportunity cost.
FAQs
1) Is rent always worse because it “throws money away”?
Not necessarily. Rent buys flexibility and reduces capital lock, which can be the safer choice when timing is uncertain or buffers are thin. If rent keeps your emergency runway intact while buying would drain it, rent may be safer—even if it costs more monthly.
2) Is jeonse always safer than monthly rent in Korea?
Jeonse can be safer on monthly cash flow, but it can be riskier on deposit return and opportunity cost. The decision flips when deposit risk rises or when realistic safe yields increase (raising the opportunity cost of locking capital).
3) How do I compare jeonse opportunity cost without predicting investment returns?
Use a range of net return assumptions (low/medium/high) and compute the monthly opportunity cost of the deposit. Then compare that to rent saved. If jeonse only wins under optimistic assumptions, it’s not a safety-first decision.
4) What dashboard signals matter most for a rules-based decision?
Distribution (price band), trend (6–12 month slope), and transaction volume (liquidity). You’re not predicting prices—you’re deciding how strong your buffers need to be and whether liquidity risk is rising.
5) When is buying “safer” than renting or jeonse?
Buying becomes safer when (1) your stress-tested payment stays comfortably below your cap, (2) you keep emergency reserves intact, and (3) you can avoid refinance/forced-sale triggers. If your plan depends on perfect conditions, it’s not safe.
6) What is a good “fail condition” sentence for a mortgage decision?
A practical one is: “If my payment at stress rate (+1%p or +2%p) exceeds my housing cap for 3 months, the plan fails.” Another is: “If my cash runway falls below X months after paying housing costs, the plan fails.”
7) How should upgraders handle timing risk between selling and buying?
Treat it as a liquidity and optionality problem. If overlap creates forced-sale risk, use a bridge strategy (rent or jeonse) that protects timing flexibility. The safest bridge is the one that avoids a forced transaction.
8) I feel stuck because everything feels expensive—what’s the first action?
Anchor a realistic price band from the dashboard, define your monthly cap, and write the fail conditions. That turns anxiety into a measurable plan. Then improve buffers (cash flow, emergency fund, debt structure) until one option clearly becomes “safe enough.”